
L2G4000——InternVL 多模态模型部署微调实践
sudo chmod +x /root/.conda/enve/你的环境名字/lib/python3.11/site-packages/gradio/frpc_linux_amd64_v0.3。2.重命名为frpc_linux_amd64_v0.3, 并放入gradio这个文件夹中(按你对应的,每个人的路径可能不一样)把自定义的安装包的路径添加到PYTHONPATH环境变量中,这样python才能
基础任务
1)理解多模态大模型的常见设计模式,可以大概讲出多模态大模型的工作原理。
多模态大语言模型(Multimodal Large Language Model)是指能够处理和融合多种不同类型数据(如文本、图像、音频、视频等)的大型人工智能模型。这些模型通常基于深度学习技术,能够理解和生成多种模态的数据,从而在各种复杂的应用场景中表现出强大的能力。
常见的MLLM:InternVL、GPT-4o、Qwen-VL、LLaVA


多模态研究的重点是不同模态特征空间的对齐

类似传统多模态,三个loss:
架构设计:
- 共享Self Attention模态交融
- 专家FFN:处理差异化模态信息

2)了解InternVL2的设计模式,可以大概描述InternVL2的模型架构和训练流程。
LLaVA式架构设计(ViT-MLP-LLM):
- InternLM2-20B
- InternViT-6B
- MLP

Intern ViT-6B-448px-V1.2
- 倒数第四层特征最有用,砍掉后三层,共45层
- 分辨率从224扩展到448
- 与LLM联合训练时,在captioning和OCR数据集上训练, 获取高分辨率和OCR能力
- Intern ViT-6B-448px-V1.5
- 动态分辨率,最多12个tile
- 更高质量的数据

Pixel Shuffle
Dynamic High-Resolution
- Pre-defined Aspect Ratios:考虑到计算资源,设置最多12个tile,就有35种长宽比的排列组合(m*n,m,n≤12;12+6+4+3+2+2+6)。
- Match and split:选择最接近的长宽比,resize过去,切片成448*448的tiles。
- Thumbnail:某些任务需要全局信息,为了更好的感知全局信息,把原图resize到448*448,一块喂给LLM

Multitask output


3)了解LMDeploy部署多模态大模型的核心代码,并运行提供的gradio代码,在UI界面体验与InternVL2的对话
训练环境配置
conda activate /root/share/pre_envs/pytorch2.3.1cu12.1
pip install -t /root/internvl_course xtuner==0.1.23 timm==1.0.9 # 防止污染环境
pip install -t /root/internvl_course 'xtuner[deepspeed]' # 防止污染环境
把自定义的安装包的路径添加到PYTHONPATH环境变量中,这样python才能找到你安装的包;还要把bin文件夹添加到PATH环境变量中,这样才能找到你用pip安装的命令行工具
export PYTHONPATH=/root/internvl_course:$PYTHONPATH
export PATH=/root/internvl_course/bin:$PATH
推理环境配置
conda create -n lmdeploy python=3.10 -y
conda activate lmdeploy
pip install lmdeploy==0.6.1 gradio==4.44.1 timm==1.0.9
网页应用部署
git clone https://github.com/Control-derek/InternVL2-Tutorial.git
cd InternVL2-Tutorial
启动demo:
conda activate lmdeploy
python demo.py然后我遇到了,这个问题bug:
Traceback (most recent call last):
File "/root/InternVL2-Tutorial/demo.py", line 119, in <module>
main()
File "/root/InternVL2-Tutorial/demo.py", line 37, in main
theme = CustomTheme()
File "/root/InternVL2-Tutorial/demo/theme.py", line 36, in __init__
super().set(
TypeError: Base.set() got an unexpected keyword argument 'button_shadow'
咋办想办法解决呗~~
然后就是把/root/InternVL2-Tutorial/demo/theme.py的
# button_shadow="*shadow_drop_lg",这个代码注释了,或者说不要了~~~
然后还有bug,困难重重啊~~~
Could not create share link. Missing file: /root/.conda/envs/lmdeploy/lib/python3.10/site-packages/gradio/frpc_linux_amd64_v0.3. Please check your internet connection. This can happen if your antivirus software blocks the download of this file. You can install manually by following these steps: 1. Download this file: https://cdn-media.huggingface.co/frpc-gradio-0.3/frpc_linux_amd64 2. Rename the downloaded file to: frpc_linux_amd64_v0.3 3. Move the file to this location: /root/.conda/envs/lmdeploy/lib/python3.10/site-packages/gradio
1.先按照提示,下载frpc_linux_amd64文件,下载(这个有时候不管用,下载不了,不然就提示有病毒,要不是就是提示代理不行,QAQ,推荐一个地方:friklogff/frpc_windows_amd64_v0.2: frpc_windows_amd64_v0.2)
2.重命名为frpc_linux_amd64_v0.3, 并放入gradio这个文件夹中(按你对应的,每个人的路径可能不一样)
3.给gradio下的frpc_linux_amd64_v0.3文件增加权限
sudo chmod +x /root/.conda/enve/你的环境名字/lib/python3.11/site-packages/gradio/frpc_linux_amd64_v0.3
一路上不容易~~~
看到如下界面:
点击Start Chat即可开始聊天,下方食物快捷栏可以快速输入图片,输入示例可以快速输入文字


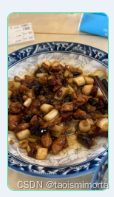
....四川滴
4)了解XTuner
配置文件
cd root/xtuner
conda activate xtuner-env  # 或者是你自命名的训练环境
cp /root/InternVL2-Tutorial/xtuner_config/internvl_v2_internlm2_2b_lora_finetune_food.py /root/xtuner/xtuner/configs/internvl/v2/internvl_v2_internlm2_2b_lora_finetune_food.py
数据集
在 /root/share/datasets/FoodieQA路径
开始微调
export PYTHONPATH=/root/internvl_course:$PYTHONPATH  # 让python能找到第一步安装在其他路径下的包
export PATH=/root/internvl_course/bin:$PATH  # 让系统可以找到你安装的命令行工具
xtuner train /root/xtuner/xtuner/configs/internvl/v2/internvl_v2_internlm2_2b_lora_finetune_food.py --deepspeed deepspeed_zero2/root/xtuner/xtuner/configs/internvl/v2/internvl_v2_internlm2_2b_lora_finetune_food.py为自己配置文件的路径。看到有日志输出,即为启动成功。
微调后,把模型checkpoint的格式转化为便于测试的格式:
python xtuner/configs/internvl/v1_5/convert_to_official.py xtuner/configs/internvl/v2/internvl_v2_internlm2_2b_lora_finetune_food.py ./work_dirs/internvl_v2_internlm2_2b_lora_finetune_food/iter_640.pth ./work_dirs/internvl_v2_internlm2_2b_lora_finetune_food/lr35_ep10/ # 输出文件名可以按照喜好设置
5)与AI美食家玩耍
修改MODEL_PATH为刚刚转换后保存的模型路径

启动网页应用
cd /root/InternVL2-Tutorial
conda activate lmdeploy
python demo.py


完成,回答成功
5)上传Modelscope(优秀任务)
我们训练好的模型上传到Modelscope

完成
更多推荐


 10
10 0
0- 0


 已为社区贡献1条内容

所有评论(0)